
by Christina | Jul 30, 2017 | Wellness

I used to feel like the length of my workout indicated its quality. Looking back, all I can do is shake my head at that idea. I could’ve gotten better results and had way more free time for other things if I had shortened my workouts and just been more efficient.
It took me far too long to recognize that you can do a kickass workout in a pretty short amount of time. I’m not sure who started the idea that the ideal time for a workout is an hour, but that’s extremely arbitrary and untrue. As I’ve said many times, I think way too many people are overtraining, especially the women I see on social media. Hour-long runs every day are doing your body no favors – I’ll tell you that. And a “50-minute HIIT class” is a complete oxymoron that will destroy your hormones in the long run. 50 minutes is not HIIT. I digress.
I personally have found better results with shorter workouts, and I’ve seen the same thing again and again with others, as well. This usually happens because the body is no longer in stress mode, and cortisol levels go down. Also, the muscles have more time to repair and actually get stronger. Beyond that, a shorter workout allows you to be more mentally focused and therefore work harder in that smaller amount of time. It’s about quality over quantity. When you go into the gym feeling like you HAVE to be there for a certain amount of time, it will just make you drag. Especially if it’s long.
We are all busy. Why spend more time than you need to in the gym, especially when it’s probably harming your body in the long run to do so?
Over time, I’ve found a few strategies that I always use to make my workouts as efficient as possible. Some of these tips are logistics, and some have to do with actually programming your workouts. Both are equally important, and any time-saving tip is worth it, in my opinion!
What To Do Before ANY Workout:
- Get off your phone. Far too many people waste time in between exercises/sets/etc. looking at their phones. If you want to get the most out of your workout, make your workout time WORKOUT TIME. Only. Not phone time. Phones are huge distractions. I used to think that my phone wasn’t really a distraction, and I would use it during my rest time or even during certain exercises. You know, trying to multitask. The truth is that it was not only mentally distracting me, but it was making me take longer rests than necessary and/or making me go slower during the workout. Focus on the workout. The phone will be there later. Nowadays I turn my phone on silent and flip it over so I can’t see the screen light up. Even just the notifications popping up makes me turn my head, and I don’t want that distraction.
- Go in with a plan. Don’t waste time trying to figure out what you’re going to do once you’re there or once you’re in the middle of the workout. Plan ahead of time, whether that means planning your actual exercises / sets / reps / etc., or just making sure to pick the workout class you’re going to attend. If you program your own workouts, don’t waste your time at the gym deciding what exercise to do next while you’re in the middle of your workout. Write it out ahead of time, go in, get it done, and finish. If you’re not programming your own workouts, make sure you’ve picked the workout ahead of time, and read through each exercise to make sure you know how to do everything before you start. That way, if you come across an exercise that you’re not familiar with, you can look up proper form / watch a YouTube video / ask someone who knows what they’re doing before you start, and you won’t waste time during your workout trying to figure it out.
- Get your equipment set up ahead of time. This goes back to the whole idea of planning beforehand. Basically, you want to get yourself set up so that once you start your workout, you don’t need to take unnecessary breaks or pauses in between. If you’re using your own equipment, have it all laid out and set up in front of you. Have the right weight plates on, the right resistance bands out, your yoga mat laid out, the space cleared, and so on all before you start. That requires already knowing your workout plan ahead of time, and then using that list to set out the equipment you need. If you’re at the gym, grab the dumbbells you need before you start, or stand in a strategic spot so you’re close to everything you’ll be using. If you’re waiting for a certain piece of equipment or a certain machine, plan on using another piece of equipment/machine nearby that’s in low-demand while you’re waiting, or set up a yoga mat close by so you can do other moves while you’re waiting.
- Work out at home. This is really more of what works for me personally, but it saves me a lot of time to do my workouts from home. I don’t have to spend time getting to the gym, waiting for equipment to be available, and potentially getting distracted by other people or things while I’m there. At home, there’s no one to distract me (unless I allow it via phone), and I don’t have to wait around for any equipment or space to be free. This might not be helpful for everyone, though. If you’re someone who uses workouts as part of your social time, then this might not work for you at all! You do YOU.
- Do a workout you actually like. This might seem obvious, but I need to say it. It saddens me how many people do workouts that they don’t even enjoy because they think it will get them the best results. People feel like they “have to” do certain things to reach a specific goal. The truth is, the best workout is the one you want to do. When you’re doing a workout you enjoy, you’ll be more motivated and will work much harder/ more efficiently. If you’re planning on doing a workout that you’re dreading, you’ll subconsciously not work as hard and will probably go slower because you’re just dragging through the workout. The mental drag translates into physical inefficiency.
How to Program Workouts for Max Efficiency:
- Use full body workouts. If you’re someone who doesn’t have a lot of time to go to the gym or can only go a few days a week, full body workouts are the way to go. It’s more efficient and effective to work your entire body a few times a week than it is to hit certain muscles just once a week. Plus, full body workouts tend to be more functional and will actually translate to real life movements. When you work your full body, you can program your workout so that you need less rest time in between exercises (will get to that in a second), which will shorten your whole workout.
- Use resistance that’s enough to challenge you, but not so much that you need to spend a lot of time resting. This takes trial and error, but you basically just need to find your sweet spot. If you use too little resistance, you might have to do a ton of reps to really work the muscles, depending on your fitness level, which could take a really long time. If you use too much resistance, though, you’ll spend too much time resting in between exercises, which will also lengthen the entire workout. Find the resistance/weight that challenges you but also allows you to keep going at a good pace with proper form.
- Use supersets and/or circuits within your workout. Supersets are when you place two different exercises back to back so that you can take less rest in between the exercises since the muscles from the first exercise will have time to rest while you do the second exercise. For example: Exercise A, Exercise B, Rest, Exercise A, Exercise B, Rest, etc. This is much more efficient than straight sets, where you do your first set, rest, do the second set, rest, etc. Circuits are the same idea – you do a few exercises back to back and repeat them with little to no rest in between. For example: Exercise A, Exercise B, Exercise C, Rest, Exercise A, B, C, Rest, A, B, C, etc. You can do this with as many exercises as you want!
- Use AMRAPs. AMRAP stands for “As Many Reps As Possible.” This is one of my go-to strategies when I’m short on time. All you do is set a timer and do as many reps as possible within that timeframe. This can be done with one exercise or a few. For instance, you could do a quick workout of as many burpees as possible in 10 minutes. Usually, though, I do this with a few exercises. An example would be 10 squats, 20 lunges, and 15 pushups for 15 minutes. For that AMRAP, you would repeat 10 squats, 20 lunges, and 15 pushups as many times as you could in 15 minutes. AMRAPs are killer, and the key is to push yourself. You want to do as many reps as you can with minimal rest. AMRAPs are an amazing way to create a very short but effective workout.
- Go for a HIIT or Tabata workout. HIIT, or high intensity interval training, is another key strategy for when I’m short on time. The key to HIIT, though, is to truly push yourself to your limits. You pick a time interval for work and an interval for rest, and then you repeat that for however long your workout is going to be. HIIT workouts are short. You don’t need more than 10-15 minutes. 20, maybe, but if you’re going that long, you’re probably not truly pushing yourself as hard as you could. If you’re really doing a HIIT workout, you’ll basically feel like you want to die very quickly. It should be a struggle to get even to 15 minutes.
You can start off with shorter work intervals and then increase them as you become stronger, and you can use any type of movement. You can sprint, jump rope, or do plyometric bodyweight movements, for example. Try doing 30 seconds of work then 30 seconds of rest, and repeating that 8-10 times. Depending on the exercises you’re doing and your fitness level, you could advance to 40 seconds on, 20 seconds off, or you could pick any other work to rest ratio. The key though, is to actually push yourself to your absolute limits during the work interval. Like I said, if you’re doing it right, you’ll literally feel like you’re going to die. (Tabata, by the way, is only 4 minutes. 20 seconds on, 10 seconds off. 8 rounds. If you’re doing this correctly, it will be the hardest 4 minutes of your life.)
You can also do “versions” of HIIT / tabata workouts by using the same format but only going to about 80% or less of your max potential, then pairing exercises back to back. For instance, you could put in 80% effort and do 3 “tabatas” of different exercises.
- When choosing exercises, place opposing muscle groups back to back. You can use this strategy within a circuit or superset to make everything more efficient. For example, you could do an exercise that works your chest, then follow that up with something that works your back. Similar idea with upper and lower body movements. Try doing an upper body move, like a military press, and then following that with a lower body movement, like a squat. This allows your upper body to rest while your lower body is working and vice versa, minimizing your overall rest time so the total workout time is shorter.
- Utilize compound movements. When you’re short on time, you don’t need to waste time isolating small muscles. Choose movements that work multiple muscles at once, like pushups, squats, lunges, military presses, etc. That gives you way more bang for your buck. Along the same lines, you can combine movements and do two at once to hit more muscle groups at one time. For example, you could do a squat press, squat to curl, deadlift to row, lunge to press, lunge twist, and so on. This allows you to get two movements in at once, and works more of your body in less time.
- Follow up a strength move with a cardio move. The idea here is to pair something that leaves you out of breath with something that lets you catch your breath. For instance, burpees then squats. Both will work a lot of your body, but burpees are more of a cardio move while squats are more strength-focused. This lets you “catch your breath” from the burpees while still working hard during squats. Ab exercises are also great “in-between” exercises to minimize rest time, because they let you slow down for a moment while still working another muscle. For instance, do burpees then leg lifts, then back to burpees. You can use those leg lifts as your “rest.”
The idea behind all of these strategies is to work hard but fast, minimizing rest time. I like to do strength moves at a faster pace in order to raise my heart rate so I can get my strength training and “cardio” in at the same time. It saves me a lot of time, and I don’t get bored!
If you employ a few of these strategies at once, there’s no reason why you can’t complete an amazing workout in a short amount of time. Some of my best workouts have been less than 20 minutes long. Get in, do work, get out. YOU GOT THIS.
SaveSave
SaveSave
SaveSave
SaveSave
SaveSave

by Christina | Jul 24, 2017 | Recipes, Wellness

The thought of sharing this brownie recipe with you brings an evil grin to my face because they are so delicious, it’s almost cruel.

I’ve been plotting to make reaaaaallllly fudgey brownies for a long time now. I cannot even begin to explain to you how determined I was to make the perfect brownie. That’s my favorite type of brownie – the fudgier (is that a word?), the better. Honestly, if I’m making brownies for myself, I prefer them undercooked so that I get that “heavy” texture. Top it with some ice cream, and I’m in pure heaven.

Creating a perfectly fudgey brownie can be difficult, though, because it requires a “heaviness” that tends to make the brownie fall apart. Because of that, this required a lot of trial and error. One night I made three batches of these in a row, and I was so frustrated because the texture and flavor were perfect, but they just kept falling apart. I took a step back, though, and finally got it right. PRAISE.

So the texture – very fudgey. How? The avocados! If you don’t usually bake healthy desserts, that might sound really strange to you. Avocados in brownies?! It’s a trade secret. I promise you – you can’t taste the avocados in these. I had a few people who do not like “healthy food” taste test for me, and they loved the taste. The chocolate hides it. Test passed.

Avocados add the creaminess and thickness that enhances the fudge factor, plus they’re high in fat. And I love to find any way to add more fat into my food!

The avocados also help make these brownies keto-friendly. If you’re not familiar with the ketogenic diet, it’s a high-fat way of eating where people burn fat for fuel instead of glucose. The avocados, eggs, coconut flour, and almond butter in this recipe are all great sources of healthy fats that will benefit anyone. We all need sources of healthy fats in our diets to support our cells.

Even if you’re not ketogenic, eating keto-friendly desserts is a great way to indulge in a sweet treat without making your blood sugar go crazy, and balanced blood sugar is the key to regulating weight, hunger signals, hormones, and basically everything else. Balancing blood sugar is the key to life.

If you’re diabetic or insulin resistant, this is especially important to be aware of! This recipe is refined sugar-free, and the sweetener I used is Lakanto’s Monkfruit Sweetener. This is a great sweetener to have on hand if you like to bake low-carb desserts! It’s a zero glycemic sweetener that doesn’t have a chemical aftertaste like Stevia and Xylitol, which I personally am very sensitive to.

If those aftertastes bother you as well, then I definitely recommend trying out Lakanto’s Monkfruit! It’s a great sub and won’t spike your blood sugar. You can also use it in other recipes as a 1:1 replacement for sugar.

Let’s get back to the brownies, though. They’re a chocolate fudge dream. But, of course, I needed to give ’em a little kick to make them more interesting. I mean, I can’t just do basic avocado brownies. 😉

That’s where the cinnamon comes in. And a dash of nutmeg. Adding in those spices not only offers an extra kick of flavor that makes these chocolate brownies taste extra sweet and comforting, but cinnamon is also amazing at balancing out your blood sugar! I put cinnamon in almost everything I bake for that exact reason.

I also topped these brownies with an almond butter drizzle to add another flavor to the mix, and a little texture on top, but it’s totally optional! I also love to do a coconut butter drizzle instead of almond butter sometimes. Coconut butter is heavenly. Even better, you can also mix them together. Either way, these brownies are to die for. You might not believe they’re low-carb and keto-friendly, but THEY ARE!

If you love chocolate, I highly recommend you whip these up. They’re incredibly quick and easy to make – you basically just throw everything in a food processor and toss them in the oven! The hardest part is waiting for them to cook, because the smell will make you drool immediately. These cinnamon avocado fudge brownies are keto-friendly, like I mentioned, but they’re also paleo, low-carb, gluten-free, dairy-free, soy-free, grain-free, and nut-free if you eliminate the almond butter drizzle!

Keto Cinnamon Avocado Fudge Brownies (Paleo / Gluten-Free / Dairy-Free)

Total Time: 1 hour
Yields: 9 Brownies

Ingredients:

Instructions:
- Preheat your oven to 350*F. Grease your 8×8 baking pan with coconut oil, or line with parchment paper.
- Add all of the ingredients except for the avocado to a large bowl and mix together until well incorporated.
- Add the mixture into a food processor, and then add the avocado. Puree until all of the ingredients are smooth and mixed together completely.
- Transfer the batter into your baking pan and smooth the top.
- Optional almond butter/coconut butter topping: Slowly add a bit of filtered water to the almond butter/coconut butter to make it as thick/thin as you want. Either use a spoon to drizzle on top of the brownie batter, or put it into a ziploc bag and cut the tip to create a more controlled drizzle.
- Cook the brownies in the oven for about 25 minutes, or until a toothpick/knife comes out clean.
- Allow to cool for 10-15 minutes.
- Serve and enjoy!

If you make these brownies, please let me know how you like them! And tag me in your photos – I love to see your baking creations!

SaveSave
SaveSave
SaveSave

by Christina | Jul 16, 2017 | Recipes, Wellness

What’s the most common thing people say they can’t give up when going dairy-free? Cheese.
It’s always cheese.

Giving up cheese wasn’t that hard for me, but I quickly discovered that I actually love paleo and vegan cheese replacements. Much much better than regular dairy. Is that weird? As I started trying more and more vegan restaurants and paleo dishes, I quickly realized that cheese-flavored things, without real cheese, were my weakness.

Nowadays, more and more people are going dairy-free. 80% of the adult population is lactose intolerant. Most people stop creating lactase, which is the enzyme necessary to break down lactose, in childhood, and then are lactose intolerant for the rest of their lives. Some people are sensitive or allergic to the casein in dairy, some are affected by the whey, and others both. It’s an epidemic!

Besides that, a huge issue in our food supply is the source of the dairy products that are widely available in the U.S. Most conventional dairy products on the shelves are not real dairy. Most of that dairy has come from sick animals and therefore is polluted with hormones, antibiotics, and other toxins, or it has been “adjusted” to become “low-fat.” In other worlds, pumped with sugar.

My point is, most people are catching onto the fact that conventional dairy does not make them feel good (digestive problems, galore), but there’s still something oh-so-delicious about that cheesey flavor. Hence, the temptation. There are a ton of ways to replicate the flavor of cheese in recipes, though, and the tastiest option is usually nutritional yeast!

If you haven’t heard of nutritional yeast, it’s a staple item in any dairy-free kitchen, whether you’re paleo, vegan, or neither. It’s a deactivated yeast that has a dry, flakey texture. It’s packed with B vitamins, which support the immune system and nervous system, and it also contains protein, iron, selenium, zinc…all of the things. If you’re following a vegan diet, nutritional yeast is especially perfect for you because it’s a great source of B12, which you won’t get in other parts of your diet.

Nutritional yeast can be used in a number of different savory dishes to add flavor, but I especially like to use it to make actual fake cheese, and in creamy sauces. I had been wanting to make a version of the cauliflower parmigiana from Jessica Sepel’s book, Living the Healthy Life, for some time, and I wanted to replace the parmesan in her recipe with a creamy, cheese-flavored sauce. (Also, if you haven’t listened to the episode of Actually Adultish featuring the fabulous Jessica Sepel, you can listen to that here. She is incredible!)

Most paleo and vegan cheese replacement recipes use cashews, like in cashew cheese. You can find a recipe for cashew cheese in my Paleo Eggplant Lasagna recipe here. Cashews are great for making anything thick and creamy, and they pair with nutritional yeast perfectly to create the ideal vegan “cheese.” In that same post, you’ll find my recipe for walnut cheese, which I discovered about a year ago and have been obsessed with ever since! A lot of people don’t realize you can use other nuts besides cashews to make a fake “cheese,” and walnuts are one of my favorites to do just that.

My MRT test showed a sensitivity to cashews, so I’m not eating them right now. Because of that, I figured I’d make a cheese sauce with walnuts as the base! Plus, cashews are high FODMAP, so this sauce is perfect for anyone who is on a low-FODMAP diet due to SIBO or IBS. I used my walnut cheese recipe as inspo for this sauce, and it turned out better than I could’ve imagined. Poured over the cauliflower dish, I was literally drooling. I paired Jessica’s cauliflower parmigiana entree with ground lamb, and this walnut cheese sauce mixed in with the lamb was truly divine.
You could use this sauce on top of meat or chicken, or pour it over vegetables. You could put it on a salad, or use it as a thinner dip. Honestly, it’s just really good with everything. I like the versatility of a sauce for that exact reason. It’s a great way to add a new flavor to anything, and it can completely transform any vegetable or protein source into something brand new. Plus, sauces always make me feel fancy. Ya know?

I also love that this requires no prep. You don’t have to soak the nuts! It’s so quick and easy, and it will literally take you less than 5 minutes to pull together. It’s delicious warm or cold. Feel free to grab the ingredients, pop it in your blender, and immediately just pour it onto your dish. Store the extras in the fridge, and you’re good to go!
This walnut cheese sauce is low FODMAP, paleo, gluten-free, dairy-free, vegan, vegetarian, soy-free, sugar-free, and way too delicious and simple not to make RIGHT NOW.

Paleo & Vegan Walnut “Cheese” Sauce (Low-FODMAP)
Total Time: 5 minutes
Makes: About 3/4 cup
Ingredients:
Instructions:
- Add all ingredients into a blender and blend until smooth. Enjoy!

What would you pair this cheese sauce with?! Let me know in the comments!

by Christina | Jul 12, 2017 | Wellness
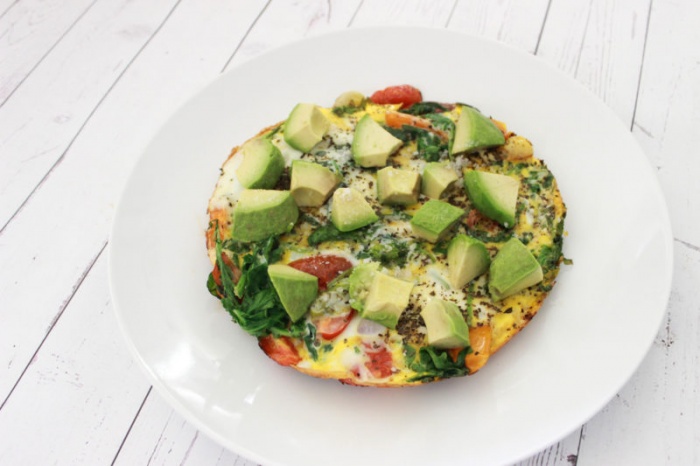
**This post was written in 2017 (I used to write posts that were more time-dependent), and after it was written I discovered I did have SIBO as well as the CBS mutation, which were causing my issues with sulfur, and both have been resolved since then.*
Yes, you read that title right. Another protocol, comin’ atcha. Kinda. I feel like my life over the past two years has pretty much been a series of protocols. I alternate between being extremely frustrated about it and laughing about it. In the end, though, I know it is only making me a better holistic health coach and will make me a better Nutritional Therapy Practitioner when I finish my program. If I can get through these protocols, then I have the personal experience necessary to really help others get through their own.
If you’ve been following me for awhile, you’ll know that I started a protocol to heal my leaky gut, food intolerances, and Candida overgrowth about 5 months ago. If you want the details, you can read all about it in this post and this post. In March, I wrote an update post, which you can read here. After that, I didn’t really have much to update anyone on. I was just truckin’ along, doing my thing, and everything was going well.
After a few months on the protocol, I felt really great. My stomach wasn’t hurting after I ate, my digestion was becoming more regular, and overall I just felt a lot better. Things were finally turning around, and I was so happy. Even though my food list was limited, following the protocol was worth it when I felt that much better.
After awhile, though, I wasn’t feeling as great. I had low energy, was getting a ton of foot cramps, and was waking up multiple times throughout the night. I was exhausted all the time because I could never get a good night’s sleep. The bloating and digestion problems started coming back more often. Waking up in the middle of the night is often due to blood sugar irregularities, so I started tracking my blood glucose levels to see what was happening. They were all over the place, which was completely bizarre. I could eat the same meal three times and have completely different blood sugar levels every time. My fasting blood glucose levels and BG levels upon waking in the middle of the night were also really all over the spectrum. Sometimes they were extremely high, and sometimes extremely low. It was really puzzling and didn’t make sense in the context of the type of diet I follow.
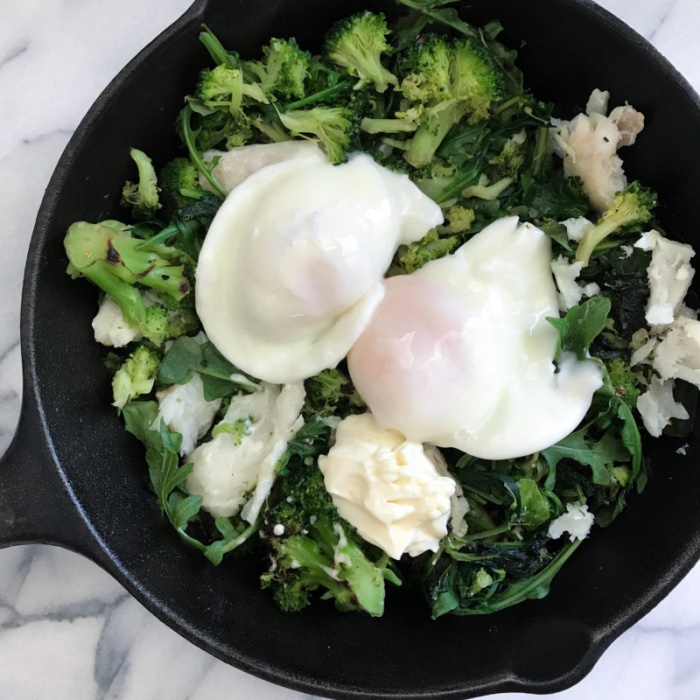
My NTP recommended I try adding in some starchy carbs, because my body seemed to be resisting keto. The symptoms I was getting were the same I have gotten before when I went too low carb for too long without carb ups, so I was hoping some starches would solve the problem. At the same time, she had me add in a number of other supplements. I started off by adding in some butternut squash, and thankfully there were no immediate weird side effects like I used to have. No stabbing pains, no fainting.
However, after a few days, I started to feel horrible. My bloating was back full force, I couldn’t have a bowel movement, I was so sluggish and tired and uncomfortable that I could barely move around, I had brain fog, I was cranky and tired, my skin broke out, and my foot randomly got so swollen that I couldn’t walk on it. I felt like all the work I had done over the past 4 months had just been wiped away from a week of butternut squash.
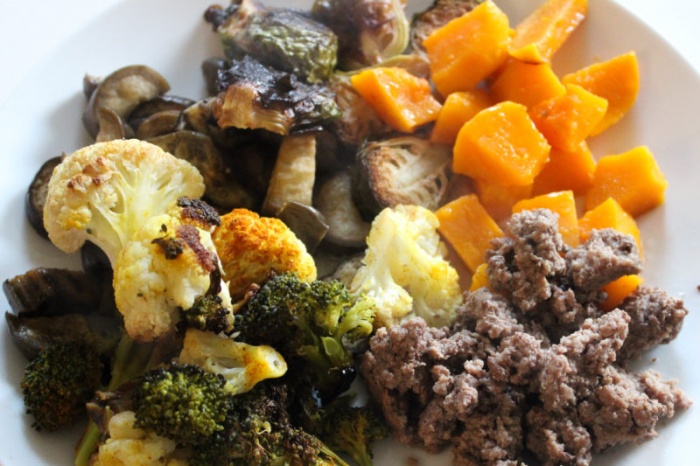
It was truly bizarre. I didn’t know if the foot swelling was connected to the food or supplements or neither, but it was all too much for me to handle, especially right before graduation. What was especially concerning, though, was that my body was responding so poorly to a starchy carbohydrate. So far into the protocol, my stomach should have been healed enough to not have that digestive distress in response to a measly 1/2 cup of butternut squash a day. This tipped me and my NTP off to the fact that something else must be going on. I needed to get through grad, so I stopped the squash and new supplements to get my body back to where it was at before. The bloating went down, the brain fog went away, my foot swelling started to reduce, and I felt much better.
After that discovery, we started looking into what else could be wrong. Clearly, there was a missing piece to the puzzle. Meanwhile, I was starting to panic because I was supposed to be nearing the end of the protocol – not finding more issues! I chatted with my NTP, a few other NTP friends, and did a lot of my own thinking, and pretty much everyone agreed that it seemed like a SIBO component was still there.
Ugh, SIBO. The bane of my existence. I thought I got rid of that thing! I didn’t want to admit it could be a possibility. (If you’re unfamiliar with SIBO, it stands for Small Intestinal Bacterial Overgrowth, and it was the main thing causing all of my symptoms a few years ago. Symptoms can include bloating, gas, abdominal pain, constipation or diarrhea, etc.)
When I retested for SIBO before starting this protocol, my test results came back looking… weird. The test for SIBO is a breath test that checks for levels of hydrogen and methane gases in the small intestine over 3 hours. When my test came back, both the hydrogen and methane were completely flat-lined. My NTP thought that was really strange and asked my doctor if he had ever seen that type of result before. She was wondering if something went wrong with the test, because there should have been at least SOME gas in there! Even just a little bump in the chart. He told us that he saw it all the time, and that it meant there was no SIBO left. We trusted his word and moved on. I didn’t have SIBO.
Or so I thought.
I think you know where this is going.
Upon further research, we learned more about a new type of SIBO that is currently being researched – hydrogen sulfide SIBO. If you’re unfamiliar with SIBO, it’s usually either methane or hydrogen dominant. That means that there is an overgrowth of bacteria in your small intestine that are either producing methane or hydrogen gas, which show different symptoms. These were the only two types of SIBO I was familiar with up until this point, and these are the two most commonly talked about.
However, we now know that there is another type of gas, hydrogen sulfide. Unfortunately, this gas cannot be detected by regular SIBO breath tests. Upon more digging, it seems to be the same story over and over. Someone takes the breath test and the results are negative for SIBO. With a flat line. But the person still has all of the symptoms. And more often than not, when the person is treated for SIBO, the symptoms go away, indicating that they did have another type of SIBO. Researchers have discovered that that other type of SIBO is hydrogen sulfide SIBO.
This was all discovered relatively recently in the scientific community, and this type of SIBO is currently being researched. They are in the process of developing a breath test to officially test and diagnose it, but it’s still in the trial stage. Apparently, there is a urine test for hydrogen sulfide, but its correlation to SIBO isn’t reliable.
My NTP went to the SIBO Symposium, hoping they would give more information about this new type of SIBO, but sadly not much was said. Dr. Mark Pimentel, known for his SIBO research, apparently didn’t want to reveal much since testing is still underway and nothing has been published yet.
Meanwhile, I obviously started researching. I tried to read everything I could about hydrogen sulfide SIBO, but the pickings were slim. There really is just not that much information about it. I dug hard, though, and I actually did find a few scientific journals, research articles, podcasts, blog posts, personal testimonies, and forums talking about it. There were a lot of people who had similar stories to mine, and treating their SIBO again, as hydrogen sulfide SIBO, was their missing piece to the puzzle. It gave me hope.
Here are some things I found to be characteristic of hydrogen sulfide SIBO versus the other types:
- Associated with SIBO breath tests that flat line and stay flat-lined throughout the third testing hour
- Tends to be associated with constipation
- Creates a characteristic “rotten egg” smell of flatulence, especially when eating foods higher in sulfur
- Linked to sulfur intolerance and an increase in symptoms when following a high sulfur diet
- Linked to fibromyalgia and chronic fatigue syndrome
- Associated with heavy metal toxicity due to methylation processes not functioning correctly
- Mood disturbances like anxiety, depression, and random outbursts of anger
Meanwhile, it was finally retesting week for me on my original protocol. During that week, I went off of all supplements and cruciferous vegetables, per testing rules. I was nervous about what would happen when I stopped all of my supplements, but I was amazed. I felt great – the best I had in a long time. My digestion was regular and my bloating went away. I had a ton of energy. Then, when testing was over and I added everything back in, I felt terrible. I was bloated, my stomach was killing me, I was constipated… it was a mess.
After all of my research and that series of events, I became convinced I have hydrogen sulfide SIBO. It just makes sense. I still have SIBO symptoms, my test results were flat lined, I have the genetic mutations that are associated with sulfur intolerance and sensitivity to heavy metal toxicity, I have constipation, “rotten egg” flatulence (sorry, not sorry), chronic fatigue symptoms, and I had noticed (but didn’t want to admit), that my body was not responding well to cruciferous veggies. I’ve also always had a problem with eggs, which is why I only eat them a few times a week if that. I discussed all of this with my NTP, and we were pretty much on the same page.
That being said, there is no way to know for sure if I have hydrogen sulfide SIBO or not since there is no official test for it. Well, that’s annoying. I’m interested in seeing if I can somehow get into the test trials being run, but we’ll see how involved that is. Because there is no way to know for sure if I have it, my NTP is reluctant to put me on a full SIBO protocol. She wants to wait and see what my other test results are, and then go from there.
Meanwhile, I was really looking forward to my appointment with her last week because my stool results were supposed to be in. If everything was good, I would be allowed to start adding some foods back in – the foods that my MRT showed I reacted to. I have been waiting so long for this, and I honestly have been getting desperate for the end of this protocol. I’m craving turkey, beef, spinach, turmeric, black pepper…However, I was really disappointed because the results weren’t in yet, so I haven’t been able to add anything in. The results we did received were my Dutch test results. Long story short – my cortisol is sky high. Typical. We’ll get into that another time.
In terms of the hydrogen-sulfide SIBO, we decided to do a little experiment. From all of my research, most practitioners were saying the best plan of action was to treat it like regular SIBO (herbals or antibiotics and a low FODMAP diet), plus do a low-sulfur diet. Since I want to see if sulfur truly is causing an issue, and because I’m curious about why I felt so good when I went off so many sulfur-rich foods during my retest week, I’m going to do an experiment. I’m going to do a 7-10 day low sulfur diet and see how that affects my symptoms.
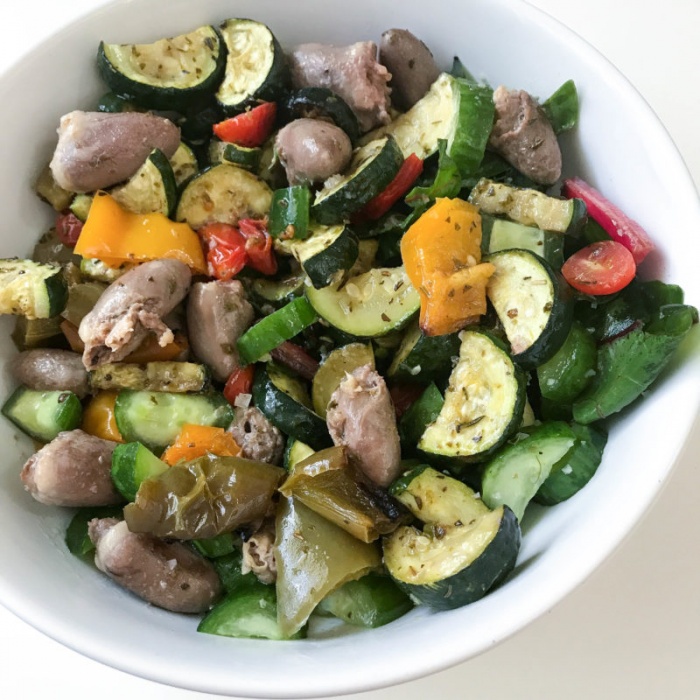
Foods that are high in sulfur are cruciferous veggies (brussels sprouts, cauliflower, broccoli, bok choy, arugula, kale, cabbage, etc.), asparagus, leafy greens, eggs, garlic, onion, sesame, spinach, turmeric, and a bunch of other random foods. Low sulfur foods include zucchini, squashes, lettuce, eggplant, tomato, mushrooms…etc.
There are a ton of different low/high sulfur food lists out there, and they all seem to conflict. It’s similar to how all of the low FODMAP lists somehow seem to conflict with each other. Because of that, I’m just sticking to one list to make things easier on myself. This is the list I’m using during my experiment, because it seemed to be the one that most people had the most success with and stood behind in terms of validity. Like FODMAPs, though, there seems to be a lot of variation between individuals.
I’m two days into my low-sulfur diet and have had a few setbacks. First of all, right before I started this, I ate as many sulfur-rich foods as I could. I was worried I was going to miss them (I LOVE CAULIFLOWER AND BRUSSELS), so I went all out on the cruciferous veggies and eggs and leafy greens. Interestingly enough, I had never felt worse in my life. I felt like a fog came over me, I felt like my mood was completely disrupted, I felt sluggish and bloated, I couldn’t have a bowel movement, and I was incredibly bloated. That was interesting.
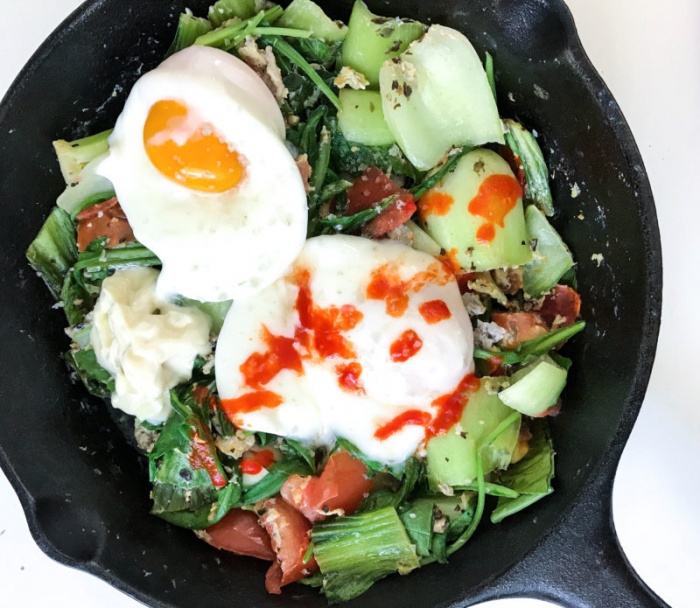
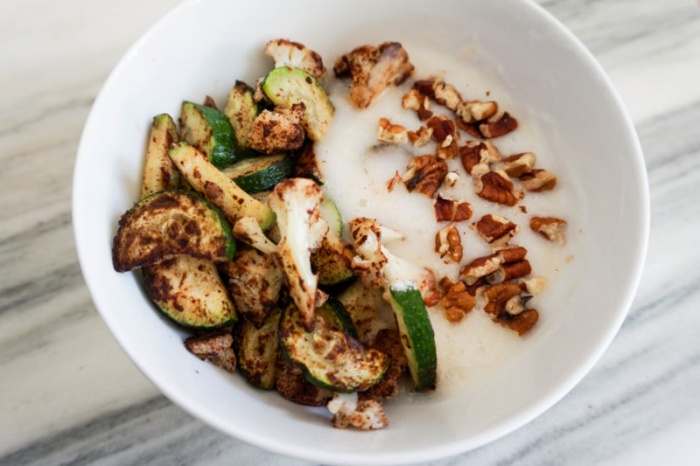
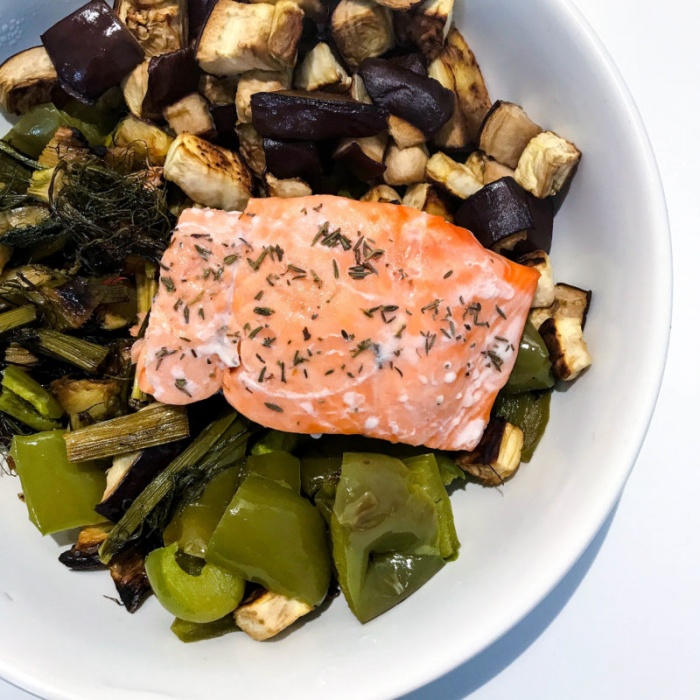
I’ve read it takes at least 4-7 days for the sulfur to start leaving your system, so I’m still waiting to see how I’ll feel. Honestly, I have been struggling because my food list is so small. Unfortunately a lot of low-sulfur foods are the same foods I reacted to on my MRT, which is limiting my options. I’m pretty much sticking to cucumbers, eggplant, fennel, zucchini, and proteins for now. I’m praying that my stool test will come in soon and show good results. Once I can add in some more foods from my MRT, the low-sulfur life will be a bit easier!
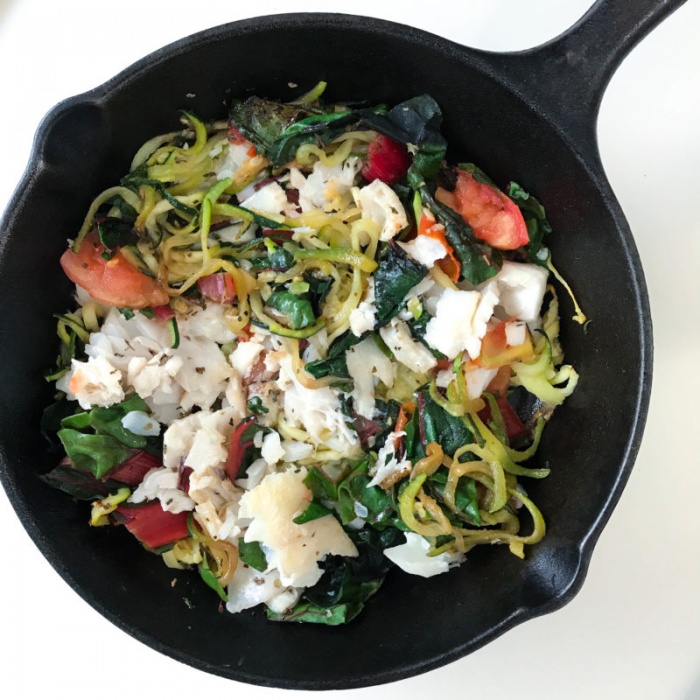
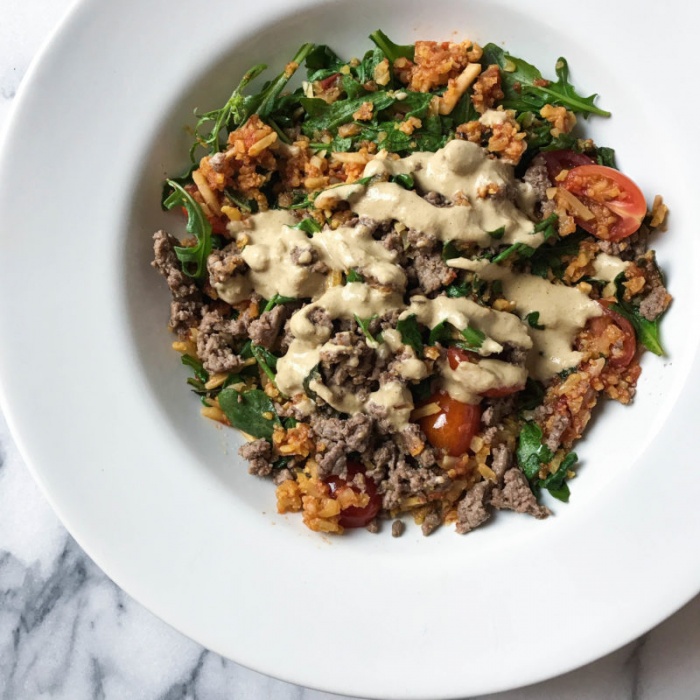
Unfortunately the only low sulfur greens are lettuce and red chard, but I reacted to lettuce on my MRT, so I’m stuck with red chard since all other leafy greens are out. I actually spent probably 8 hours the other day trying to figure out if endive was low or high sulfur because I was so desperate for another option for salads, but I kept reading conflicting things so I gave up. I’ll be eating a lot of red chard, in the meantime.
The first two days have also been hard because I realized how repetitive my meals are going to be. I’m going to be eating a lot of zucchini! And not being able to have much salad makes things more difficult because I have to cook a lot more (especially when it’s a million degrees outside), but I’ll get used to it. It’s only 7-10 days, and if this is the key to my digestive issues, it will be so worth it.
Sulfur is incredibly important in our diets for a number of functions, so I would never plan on cutting sulfur completely out of my diet forever. I just want to get my body to a baseline and figure out if I am somewhat intolerant to sulfur, or if hydrogen sulfide SIBO could be a factor in my symptoms. If either is true, it’s all about finding my body’s limit with sulfur so I can feel my best, instead of overloading my body with too many sulfur-rich foods at once, which I might have been doing before.
I will keep you updated on how this experiment goes, and I’m hoping that I can start adding in MRT reactive foods very soon to make the next 7-10 days easier! Wish me luck!
SaveSave

by Christina | Jul 4, 2017 | Recipes, Wellness

When it comes to recipe inspiration, I’ve been feeling really nostalgic lately. I keep thinking about the meals that were my absolute favorites growing up – meals that remind me of simpler times when there was a lot of food, family, friends, laughter, and togetherness. Meals that have a lot of memories attached to them.

Chicken piccata is one of those meals that will always remind me of my hometown and family. It wasn’t a dish that I got to eat very often, but everyone knew it was my favorite. It was my “special occasion” meal, and I always felt sophisticated when I ate it. A nice deviation from my usual McDonald’s cheeseburger and Annie’s Mac ‘n’ Cheese.

Whenever I went over to my aunt’s house for dinner, I would always ask her to cook chicken piccata or chicken parmesan. She’s the big cook in the family, and she has a particular proclivity for Italian dishes.

Whenever my mom wanted to make me a “special” dinner, I always asked her to make chicken piccata. If we went out to a fancy Italian restaurant for dinner, chicken piccata was always my order. The point is, it was my thing. I’ve always been a creature of habit.

It’s a simple dish, but extremely flavorful. Any protein paired with lemon is delicious, in my opinion. Chicken piccata takes lemon chicken to a whole new level, though.

Thankfully, it’s really simple to create a paleo version of chicken piccata. When I think of chicken piccata, I think: breaded chicken, lemon-y sauce, capers, and pasta. I personally think of angel-hair pasta specifically, just because that’s what I always ate it with growing up.

When you break it down like that, you can see how easy it is to create a healthy, gluten-free, dairy-free, paleo, keto version of that dish! The breading can be replaced with a healthier flour – in this case, I used almond flour. The lemon sauce can be made without any dairy or unhealthy oils. The pasta can be replaced with a vegetable noodle. The capers and chicken?We’re all good on that front.

I chose to use kelp noodles in this dish as a pasta replacement. Kelp noodles are basically a flavorless noodle, which is why I love to use them in dishes with good sauces. They’ll soak the sauce in and take on its flavor, which makes them really versatile. And they’re just like angel-hair pasta in consistency – thin and light. They also require almost no prep besides a few minutes of soaking. You can eat them cold or warm. They’re also really low in carbs, so they’re great even if you’re on a low-carb or ketogenic diet.

If you’re not into kelp noodles, you could also use a different type of vegetable noodle. Zucchini noodles or another type of squash noodle would work really well with this! I think that the kelp noodles are best, though, just because they really allow the taste of the lemon sauce to shine through. And I’m all about that lemon sauce.

Speaking of the lemon sauce, I’ve always been picky about that. I’ve tried my fair share of chicken piccatas throughout my lifetime, and my favorites are always the ones with a really creamy lemon sauce. I don’t like it to be heavy like an alfredo, but I like it to be creamy. A little more than just a lemon-y oil or a thin lemon drizzle.

I remember as a child always looking eagerly at the waiter’s hands to see what the dish looked like the moment it came out. If it was covered in a white sauce, I had struck gold. If it was a clear/light yellow, I was always a tad disappointed. The creaminess makes it! And that’s why I love the creamy lemon sauce in this recipe. I could literally pour it on anything. I actually do pour it on everything!

I love this dish because it tastes extravagant and packs a big punch, but it really is incredibly easy to make. You basically cook some chicken, throw everything in a big pan, and allow it to simmer up. There are a few more steps in there, but you get the gist. Not too many ingredients, and very minimal cleanup. I love one pan meals!

I also adore this meal because it’s great for leftovers. You guys know how much I love my leftovers! I shared some pictures of how I plated it later on to give you ideas. For example, one day I literally just put it over greens (arugula) to make a fancy salad, and it was absolutely delicious.

Another day I poured it over some steamed broccoli and greens I had on hand, and one night I paired it with some brussels sprouts I had in the fridge. It’s one of those meals that actually tastes better as leftovers, because the veggies and chicken have had even more time to absorb the creamy lemon sauce.

I paired this with asparagus, but if you don’t like asparagus, feel free to sub it out for another vegetable! I also love to make chicken piccata with mushrooms and broccoli. Get creative. Remember, recipes are not rules. Put your own spin on it!

If you’ve never tried chicken piccata before, you’re in for a real treat! This classic Italian dish will quickly become a favorite if you enjoy fresh, light meals and bold flavors. If you’re a lemon-lover like me, you’ll definitely fall in love with this!

I really hope you enjoy this quick and easy, healthy Chicken Piccata! It’s definitely a crowd-pleaser, and it should fit in with anybody’s diet. This dish is paleo, gluten-free, dairy-free, grain-free, soy-free, candida-friendly, low-carb, keto, and absolutely delicious. It’s the perfect meal to make if you want to impress your friends and seem fancy without actually doing any hard work!


Creamy Chicken Piccata (Paleo / Gluten-Free / Dairy-Free)
Serves: 4
Total time: 35 minutes

Ingredients:
- 1 can full-fat organic coconut milk (no guar gum)
- 1.5 lbs organic chicken breast cutlets
- 1/2-3/4 cup almond flour
- 1 tsp celtic sea salt
- 1/2 tsp black pepper
- 2 large lemons
- 1/2 cup capers (about 1 container)
- 1 bunch asparagus
- 1 package kelp noodles
- oil for cooking (avocado oil, coconut oil, ghee, etc.)

Instructions:
- Open the kelp noodle package and put the kelp noodles in a large bowl covered with filtered water. Soak them for about 10 minutes.
- Heat up a large pan/skillet with high sides using your cooking oil of choice. (I used a large ceramic pot/skillet with sides that were about 3-4 inches high so that I could do everything in one dish, but you could also cook the chicken in a different pan and use a bigger pot for the sauce / noodles. This is the skillet I used. )
- In a small bowl, mix your almond flour, sea salt, and pepper all together.
- Dip the chicken breast cutlets in the almond flour mixture so both sides are coated. The mixture should stick to the chicken.
- Put the chicken in the pan and allow to cook on medium heat for 3-4 minutes. Flip the chicken and cook for an additional 3-4 minutes, or until slightly browned. While the chicken is cooking, wash the asparagus and cut the spears into smaller, bite-sized pieces
- When the chicken is done cooking, remove it from the heat and place it aside on a plate.
- Add the coconut milk and the asparagus into the skillet. Stir together, then bring to a boil. Allow to reduce for 2-3 minutes, then bring to a simmer. Juice the two lemons and add the juice to the mixture. Toss in the capers, and a few shakes of salt and pepper. Mix everything together.
- Strain the kelp noodles and use some kitchen scissors to cut them up into noodles that are as long/short as you want. They come in really long strands, so cutting them a little bit will help when you eat them! (I like mine really short, but most people might not like to cut them that much.)
- Add the kelp noodles into the skillet and stir in. Add the chicken back into the skillet. Allow everything to sit at low heat for a few more minutes, until the asparagus has softened to your liking and everything has gotten a chance to soak in the sauce.
- Remove from the heat and serve!

I hope you enjoy this version of Paleo Chicken Piccata! If you make it and take a picture, please tag me so I can see!

SaveSave
SaveSave
SaveSave
SaveSave
SaveSave
SaveSave
